
kwhited asked:
- How she could save a Photoshop file and import it into Word so she could print it at home.
Dear kwhited,
First off I would not put any files into Microsoft Word. When you insert the file it compresses the image and lowers the resolution (quality). If you are just trying to print it from home you can save the Photoshop design as a .tiff. This is like a .jpg but it allows you to save the layers of the file and it doesn't compress the image as much as a .jpg.
When you get home just open the file in the Windows Viewer (built in program in Windows) and print it from there.
This should give you the best results as well as save you the time of putting the file into a word document.
MunleysWifey asked:
- What all the tools were in Photoshop.
- How to make a 10x10 wedding album page so she could upload it. She wanted to be able to cut a picture in 1/2 so one was on the right page and 1/2 was on the left.
Dear MunleysWifey,
You are sure asking for a tall order! Instead of reinventing the wheel I will refer you to a great tutorial for Photoshop beginners: http://www.g3fusion.com/?p=8. This tutorial will walk you through all the basic functions of the Photoshop Tools.
Hopefully I understand what you are looking for with the other request, if not please leave me a comment to let me know. I will show you how to cut a picture in half and save each image as a separate file.
Step 1 Open your photo in Photoshop: From Photoshop you can hit Ctrl + O, then select the location of your image.
Step 2 Turn on the Rulers by hitting Ctrl + R. Or you can go to View . Rulers.

Step 3 Select the square Marquee tool and select 1/2 of the picture.
Step 4 Hit Ctrl + C to select what you drew a selection around.
Step 5 Hit Ctrl + N to open a new canvas. This canvas will automatically be the size you need (it does that when you select ctrl + c). Hit Hit Ctrl + V to paste your image onto the new canvas.

Step 6 Go back to the original image and Inverse, Shift + Ctrl + I or Select > Inverse, the selection. This will select the other half of the image.
Follow steps 4 and 5 for this section and you are finished.
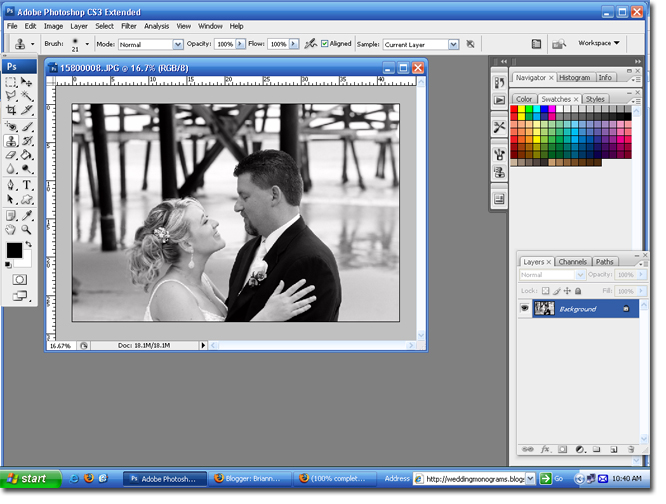
Original Photo

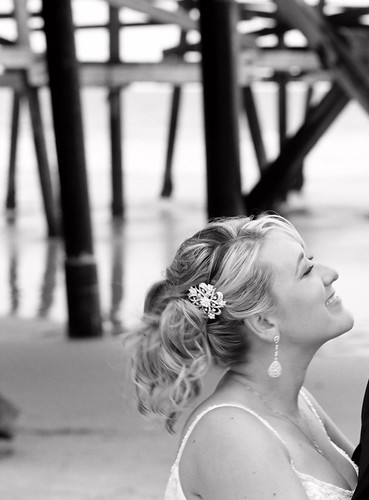
Right Half
Left Half
I hope these tutorials answered some questions and were of help.
Thanks,
BriannaNichole!
1 comment:
Hooray! You rock! Thanks.
Post a Comment