For those of you not in the know, that is attention whore. I just had to toot my own horn because I just got a shout out from Card of The Week for Tutorial Tuesday.
Her blog is pretty cool, go check it out.
BriannaNichole!

Tuesday, May 13, 2008
Thursday, May 8, 2008
How To Draw Lines
If you look at a lot of my monograms, or other designs, you will notice that I have included lines in them. I think they add a lot to a monogram. The are especially good if you want to have a lot of elem nets to a monogram, they help to separate the monogram and make it look 'cleaner'. In this tutorial I am going to show you how you can create one of my favorite monograms that include lines.

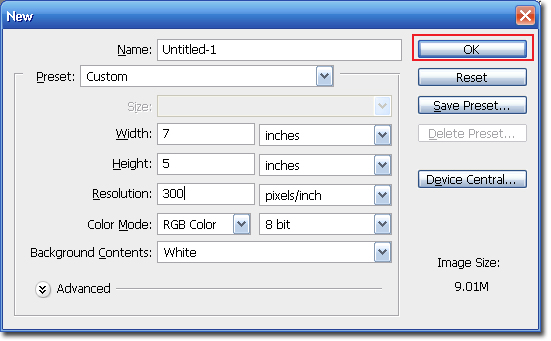
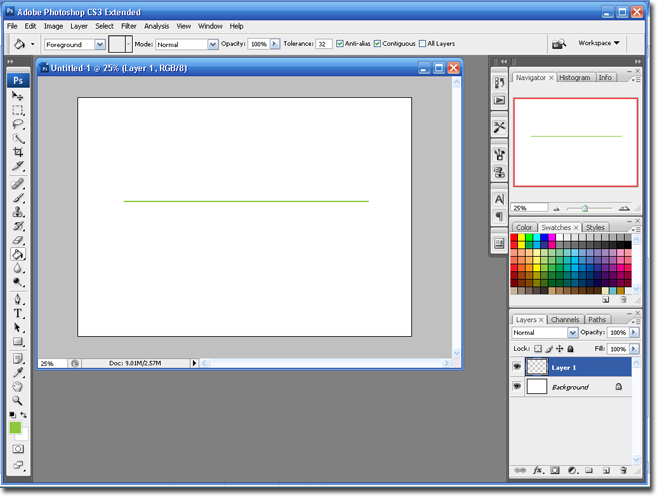
Step 1 Open Photoshop and create a new canvas: File > New or Ctrl + N.
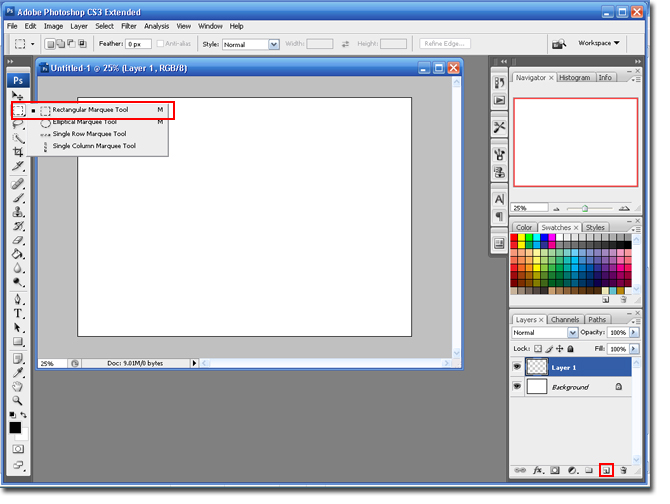
Step 2 Create a new Layer by clicking on the Add a New Layer icon and select the Rectangle Marquee tool.
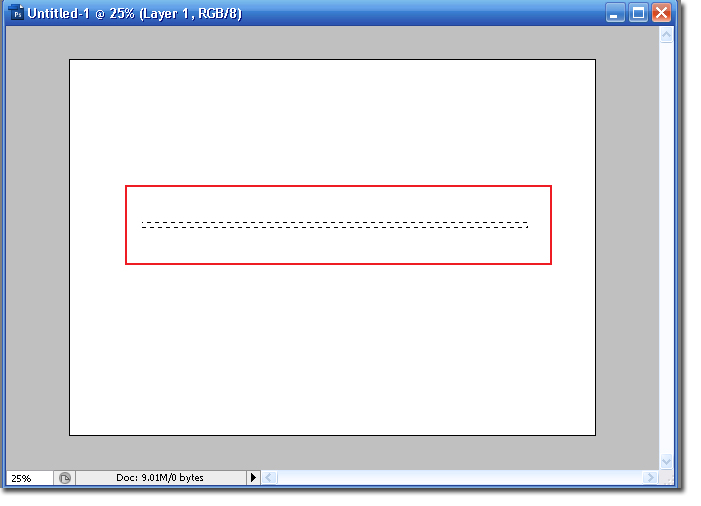
Step 3 You are going to use the Marquee tool to draw your line. Just Left-Click on the canvas and drag the line to the side until you are happy with the length of your line. Don't worry if it is too thick or long we can fix that later.
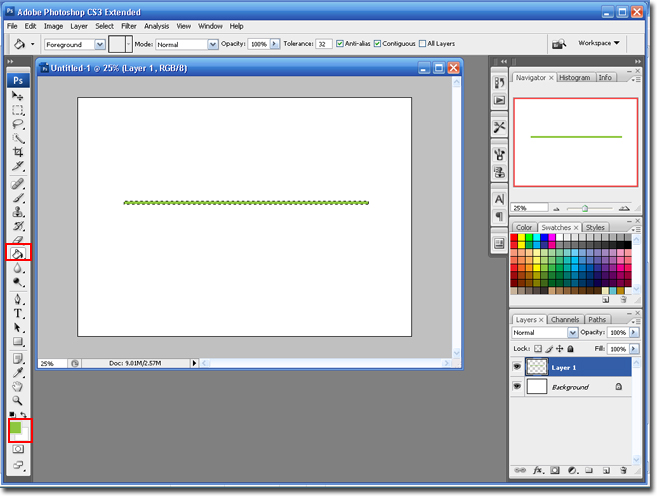
Step 4 Select the Foreground Color Tool and change it to the color you desire. Select the Paintbucket Tool and click once on the line to add the color.
Step 5 If your line is too thick; use the down arrow key on your keyboard to move the section (dancing ants) down. When the line is as thick as you want it hit the Delete button to remove the excess. When you are finished hit Ctrl + D to remove the selection (dancing ants).
Step 6 Create a new layer, select the Type Tool and type the: Bride and Grooms Name, Wedding Date and Location. I am going to use Times New Roman, All Caps, 16pt and I am using 4 spaces between each word. You may need to play around with this a little until you are happy with the result.
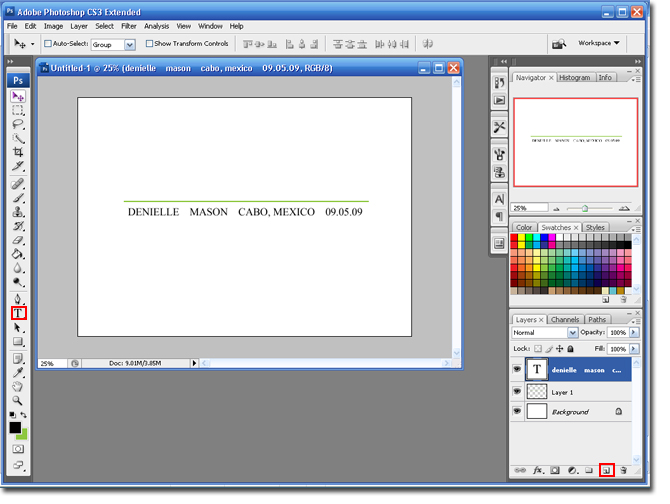
Step 7 Duplicate the layer that has the line: Ctrl + J. Select the Move Tool and move the Line layer copy under the text you created.
Step 8 Create a new layer, select the Type Tool and type the last name of the bride and groom. Make sure to select a script font that is a bigger size. This text will sit on top of the line.

Step 9 Use the Crop Tool to remove the excess canvas.

You are finished. Try being creative and adding some elements to the monogram. I added some dots and a Palm Tree dingbat to mine.

Step 1 Open Photoshop and create a new canvas: File > New or Ctrl + N.
Step 2 Create a new Layer by clicking on the Add a New Layer icon and select the Rectangle Marquee tool.
Step 3 You are going to use the Marquee tool to draw your line. Just Left-Click on the canvas and drag the line to the side until you are happy with the length of your line. Don't worry if it is too thick or long we can fix that later.
Step 4 Select the Foreground Color Tool and change it to the color you desire. Select the Paintbucket Tool and click once on the line to add the color.
Step 5 If your line is too thick; use the down arrow key on your keyboard to move the section (dancing ants) down. When the line is as thick as you want it hit the Delete button to remove the excess. When you are finished hit Ctrl + D to remove the selection (dancing ants).
Step 6 Create a new layer, select the Type Tool and type the: Bride and Grooms Name, Wedding Date and Location. I am going to use Times New Roman, All Caps, 16pt and I am using 4 spaces between each word. You may need to play around with this a little until you are happy with the result.
Step 7 Duplicate the layer that has the line: Ctrl + J. Select the Move Tool and move the Line layer copy under the text you created.
Step 8 Create a new layer, select the Type Tool and type the last name of the bride and groom. Make sure to select a script font that is a bigger size. This text will sit on top of the line.
Step 9 Use the Crop Tool to remove the excess canvas.
You are finished. Try being creative and adding some elements to the monogram. I added some dots and a Palm Tree dingbat to mine.
Thursday, May 1, 2008
Monogram Contest Winner!!!
I just wanted to thank all of you that participated in the monogram contest. I got so many amazing entries that it was super hard to choose. Here are some of the AMAZING things that you have been doing with my tutorials:
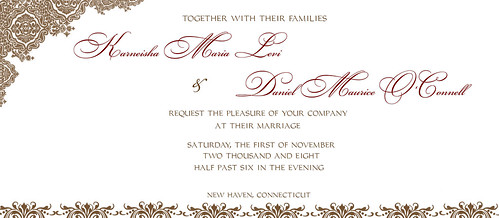
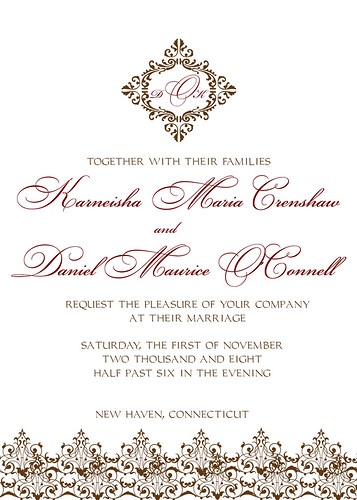
Karneisha created some beautiful invitations using my Get This Look Invitation,Photoshop Brushes and the Dumask Design Tutorials.
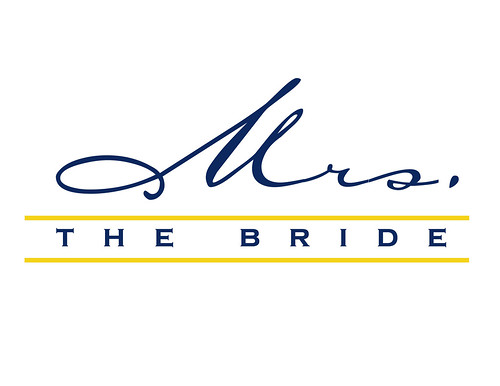
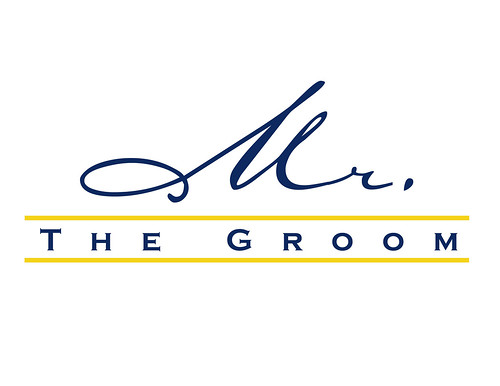
Gina made some cool Mr. and Mrs. signs and a great monogram using my Mr. and Mrs. and Letter Behind Monogram Photoshop Tutorials.

Shelley created a shabby chic damask invitation using Damask Photoshop tutorial.

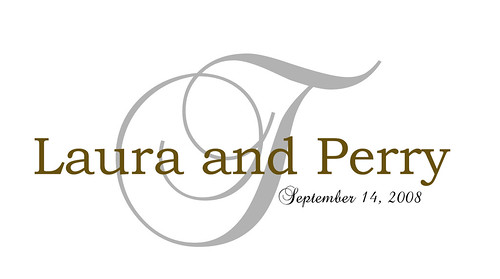
Laura made one of my favorite monogram styles with the Letter Behind Monogram Photoshop Tutorials.
Thanks to everyone who sent in designs. You guys all did an amazing job! Too bad there can only be one winner. I think I have to say my favorite design, both for creativity and beauty has to be Karneisha. I loved that she took the a few tutorials and combined them to make some really great invitations.
Thanks,
BriannaNichole!
Karneisha created some beautiful invitations using my Get This Look Invitation,Photoshop Brushes and the Dumask Design Tutorials.
Gina made some cool Mr. and Mrs. signs and a great monogram using my Mr. and Mrs. and Letter Behind Monogram Photoshop Tutorials.
Shelley created a shabby chic damask invitation using Damask Photoshop tutorial.
Laura made one of my favorite monogram styles with the Letter Behind Monogram Photoshop Tutorials.
Thanks to everyone who sent in designs. You guys all did an amazing job! Too bad there can only be one winner. I think I have to say my favorite design, both for creativity and beauty has to be Karneisha. I loved that she took the a few tutorials and combined them to make some really great invitations.
Thanks,
BriannaNichole!
Subscribe to:
Posts (Atom)